
You have just started a business and you are looking for a copier to carry out your daily printing and scanning jobs and you want to control this budget item.
You have therefore naturally considered buying a second-hand photocopier. However, you are not sure which model to choose and you would like to know if it would be better to buy a reconditioned copier.
To guide you in your choice, you would like to know what is behind the jargon “refurbished”. In other words, you want to know the steps involved in reconditioning used photocopiers.
Your used copier refurbished by Ishara will bring you many years of satisfaction. Our rigorous used copier refurbishment process has been designed to give you satisfaction and peace of mind. Here are the steps involved in the refurbishment of our used copiers.
Step 1 of the reconditioning of a used photocopier: the delivery control
Used photocopiers purchased by Ishara are deemed to be in working order. They are machines that have reached the end of their leasing contract and have completed approximately 1/4 to 1/3 of the operating time for which they were designed by the manufacturer. However, it is important to test them thoroughly to make sure that they have been properly maintained and that there is not a particularly worn out part hidden inside a functional machine.
All modern photocopiers are equipped with internal software that monitors the operation and records all mechanical events of the machine. This software can be queried to obtain the machine’s pedigree and thus assess the suitability of the copier for reconditioning.
The diagnosis obtained is called the P Print. It presents, among other information, the rate of wear of the drums, the fuser and the belt and thus allows to have a precise idea of the work to be done to proceed to the reconditioning of the second-hand photocopiers.
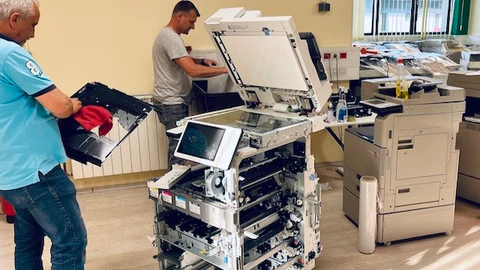
Step 2 of used copier refurbishment: disassembly and cleaning
Once the condition of the machine has been checked and its suitability for reconditioning has been established, we move on to disassembly.
This operation takes about an hour and is all the easier if the copier is recent. This is why we only choose machines that are 6 years old or less from Canon and Konica-Minolta.
The dismantling is the preliminary stage to the in-depth cleaning and the change of the wearing parts. Indeed, it is not rare that during the disassembly, it appears that parts supposedly in good condition need to be changed. Without this step, these parts would have remained in place and would have caused a breakdown in the more or less short term.
The cleaning is done in two steps. The first step consists of wet cleaning the casings and protective plastics to make them look like new. A second step during which, the interior of the photocopier including the electronic cards is blown with a high pressure air jet and then vacuumed in order to remove all printing residues (toner powder and paper dust accumulated on the rotating parts).
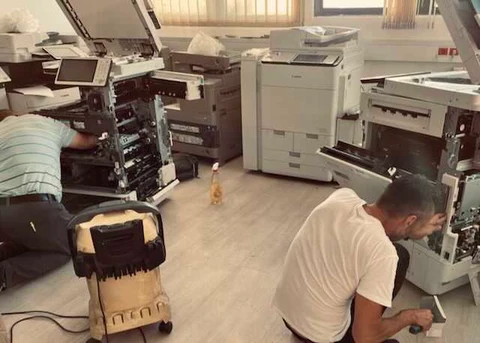
Step 3 of the used photocopier reconditioning process: replacement of worn parts and reassembly
The first two steps of the used photocopier reconditioning process have allowed us to make a precise diagnostic assessment of the condition of the used photocopier that we wish to recondition. It is now time to proceed with the replacement of the worn parts by new ones and thus to allow the photocopier to leave our workshops as new. The technicians will replace the four printing drums, the transfer belt and the worn out parts of the oven. They will also replace all the pins and cleats used to grip and guide the sheets of paper as they pass through the copier.
The used toner receptacle is changed. The four developers that work in conjunction with the drums will be replaced. Finally, the guide rollers and the cleaning squeegees (transfer cloth and drums in particular) are replaced by new parts. Finally, the scanning unit will be completely cleaned and all moving parts and sheet guides will be changed. The four laser boxes (one per color) will be cleaned and then readjusted.
Final step of the photocopier reconditioning: the reassembly and the test of correct operation
All that remains is to reassemble the parts that did not need to be changed and to put the plastic covers back in place. The photocopier is now reconditioned to new and has all the characteristics of a new machine except for a few traces of wear on the covers.
Now it’s time to test the machine to make sure it’s working properly. A new PPrint is printed and then a series of printing and scanning tests are performed to ensure that the copier is working at full power and under a heavy load. About 100 pages are printed or scanned during this final test.
The copier is then pre-packaged for shipment to our warehouse. Lightweight adhesive strips are used to keep the drawers and traps in place. The machine is covered with a plastic film to protect it from humidity or dust. Electrical and computer cords are stored in the last drawer, ready to be plugged in. Printed test results are slipped under the document feeder and stored in our servers.
This concludes the process of reconditioning used copiers at Ishara, which ensures that they will run smoothly for many years. Still not sure which model to buy? You can check our comparison of the main features of the copiers we sell side by side. If you have any further questions, please do not hesitate to contact us here.